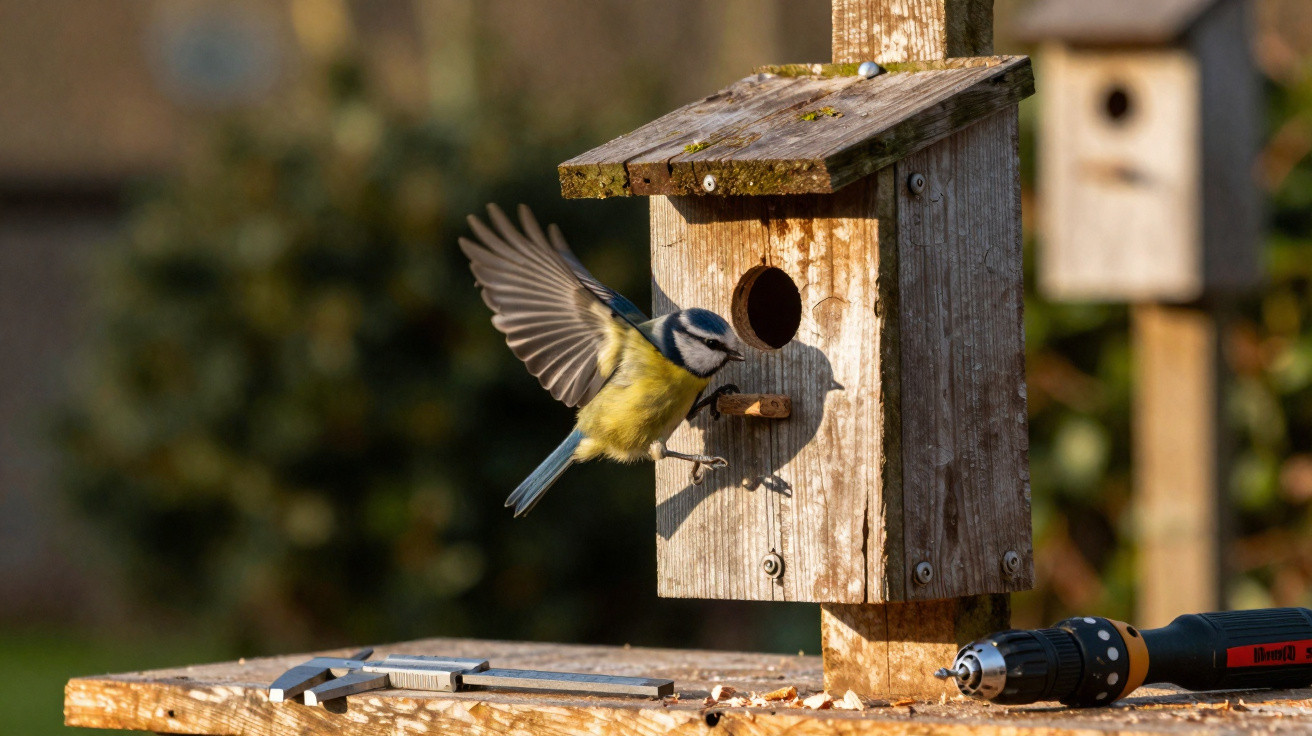
The nest box is hanging perfectly, the view is excellent and the timber is new – yet not a single tit moves in. In many cases, the reason for this frustration is not the location but a detail that almost everyone underestimates: the precise diameter of the entrance hole.
Why the hole in a nest box matters more than its location
When choosing a nest box for tits, people often focus first on its appearance: attractive timber, a stylish pitched-roof design or perhaps even a coat of coloured paint. For birds, however, one factor matters above all else: can their bodies fit through the hole, while predators remain outside?
For tits, the entrance hole acts like a security lock: only those that fit the exact “profile” are allowed in.
If the opening is too small, the birds simply cannot enter. If it is too large, other species may take over the box or attack the brood. The nest box then either stays empty or becomes occupied by species you may not have wanted in the garden.
The key measurements: 28 mm and 32 mm
There are clear guideline measurements for native tit species, making it difficult for amateur gardeners to go wrong.
For smaller tit species
The smaller species include, among others:
- Blue tit (Cyanistes caeruleus)
- Coal tit (Periparus ater)
- Willow tit / marsh tit (Poecile palustris)
These birds use openings of around 25 to 28 millimetres. In a typical family garden, an entrance hole measuring 28 millimetres has proved effective: it is large enough for smaller tits but still narrow enough to keep many competitors out.
For great tits
The great tit (Parus major) has a sturdier build and therefore needs slightly more room. The usual standard is an entrance hole of 32 millimetres. This allows great tits to enter and leave comfortably; smaller tits will generally still use boxes of this size if enough vacant sites are available.
28 millimetres for smaller tits, 32 millimetres for great tits – these figures alone often determine whether a box is “occupied” or “empty for years”.
How to correct the wrong entrance-hole size quickly
The good news is that a nest box with an unsuitable entrance-hole diameter does not need to be thrown away. It can be put right in just a few simple steps.
- Hole too large: Screw a metal entrance plate with a 28 mm or 32 mm opening over the existing hole. These plates are available from DIY shops and specialist retailers.
- Hole too small: Neatly enlarge it to the required size using an appropriately sized Forstner bit or hole saw.
- Smooth the edges: Lightly sand away wood fibres and splinters so that the birds cannot injure themselves.
A useful rule to remember: below the recommended diameter, tits simply cannot get through. Make the opening considerably larger, and you invite unwanted occupants – or even predators.
Protection from sparrows and predators – the effect of the diameter
The correct entrance-hole diameter does more than provide a suitable fit; it also creates a safety barrier.
| Entrance-hole diameter | Typical effect |
|---|---|
| 27–28 mm | Ideal for blue tits; many other species remain outside |
| 32 mm | Suitable for great tits, with still fairly good protection |
| 35 mm | House sparrows can move in, often displacing tits |
| 40 mm and above | Predators such as woodpeckers, mustelids or cats’ paws can reach inside more easily |
House sparrows in particular readily use larger openings and are far more assertive than tits. By occupying the cavity earlier, they can prevent an entire generation of tits from breeding there.
Holes that are too large effectively open the front door to sparrows – and to predators with claws and beaks.
More than the hole: nest box construction
For a box to appeal to tits, the overall design also matters. Several construction details have proved worthwhile:
- Hole position: Place it in the upper third of the front panel. This makes access more difficult for predators and reduces the risk of young birds falling out.
- No perch: The cute-looking miniature perch is unnecessary for tits and is more likely to help predators hold on.
- Timber thickness: At least 15 millimetres. This provides insulation and strength.
- Untreated wood: Avoid varnishes and harsh protective coatings, as their smells deter birds.
A straightforward box made from untreated timber, with an appropriately sized hole and practical construction, is far more likely to be used than a decorative designer birdhouse with incorrect dimensions and a solvent smell.
The best time and height for putting up a nest box
Tits start early, searching for suitable cavities for the coming season as early as late winter. Anyone who installs a nest box only in April is already late.
- Installation time: Ideally in autumn or winter, and no later than the end of February.
- Height: Around 2 to 4 metres above ground level.
- Fixing: Secure it to the trunk with wire or a strap, cushioned with a piece of hose to avoid damaging the bark.
It is important to leave sufficient distance from busy feeding stations. If the box is directly beside a feeding area, breeding tits can feel disturbed by the constant visitors.
Nest box orientation and the microclimate inside
Wind and sunshine also play their part. Excessive heat or continuous rain directly hitting the nesting site can make a box unattractive or dangerous.
The following arrangement works well:
- Orientation: Face the opening roughly north-east to east. This normally keeps out the midday sun while also sheltering the box from prevailing westerly winds.
- Roof: It should be rainproof, while allowing a small amount of ventilation beneath the roof or at the sides.
- Drainage holes: Drill several small holes in the base so that any water entering the box can drain away.
A typical poor example is a glossy, varnished nest box from a garden centre, with a huge opening of around 45 millimetres, hanging in full sun. Solvent fumes and the incorrect hole size ensure that tits simply ignore such a box for years.
Small tricks to help tits move in sooner
Some nest boxes need a season before they are used for the first time. A few simple measures can significantly improve the chances:
- Rub the inside walls with a little damp soil and allow them to dry; this makes the box seem “used” and familiar.
- Position the box so that nearby shrubs or trees provide cover, but do not create a direct jumping route for cats.
- Do not hang several boxes too close together, as tits are territorial. A distance of at least 10 metres is sensible.
A box that looks slightly “used” often seems safer to birds than a freshly planed, high-gloss model.
Cleaning and maintenance for future breeding seasons
Once the young birds have fledged, the box contains a mixture of nesting material, droppings and parasites. This old nest material can affect future broods, so the box should be cleaned once a year.
- Choose the right period: autumn or winter.
- Remove the nesting material and sweep out the interior with a brush.
- Do not use cleaning products; lukewarm water is sufficient, then allow the box to dry thoroughly.
A well-maintained nest box with the correct entrance hole provides safe nesting places for years, particularly in areas where old trees with natural cavities are lacking.
Why a few millimetres determine success in the garden
Many amateur gardeners waste huge potential because they drill the entrance hole only “roughly” to size or blindly trust an attractive ready-made model. Tits are adaptable, but their flexibility has limits. If the dimensions are wrong, they will move on.
Anyone who deliberately chooses between 28 and 32 millimetres, matches the box to the birds present in the garden, and gives some thought to the material, orientation and height will usually be rewarded the following spring with lively arrivals and departures at the nest box. A dull decorative object then suddenly becomes a piece of living nature right outside the window.













Comments
No comments yet. Be the first to comment!
Leave a Comment